Chapter 10, "A Fancy Button Bean," takes you step by step through the design and development of your first complete bean, the fancy button bean. This chapter continues along the same lines by stepping you through the design and development of a meter bar bean. Meter bars are often used to represent the status of time-consuming operations such as copying a large file. A meter bar basically consists of a graphical bar that increases in size, depending on the status of an operation. This chapter takes you through the complete design of the meter bar bean and presents you with the complete source code and related resources required to implement the bean.
Although the process of designing and developing a bean is roughly the same for
all beans, you'll notice throughout this chapter some differences between the meter
bar bean and the fancy button bean you developed in Chapter 10. These differences
primarily involve the fact that the meter bar bean performs an entirely different
function than the fancy
button bean. The design and development of every bean is different in some way; this
means that the more beans you create, the easier bean construction gets. That is
the main reason Part III, "Creating Your Own Beans," focuses on the creation
of four different beans. But enough about other beans, let's get started with the
meter bar bean.
This chapter covers the following major topics:
You learned a great deal about bean design in Chapters 9, "Bean Construction Basics," and 10, which should make the design of the meter bar bean a little easier to work through. Fortunately, the design of the meter bar bean is straightforward, as you'll soon see. To start, let's go over exactly how a meter bar works, so you'll better understand the requirements of the bean. A meter bar is basically a rectangular area that reflects a measurement of some process or changing value. You can think of a meter bar as being visually similar to a mercury thermometer, in which the mercury line increases with increasing temperature and decreases with decreasing temperature. A meter bar can also increase and decrease, usually to reflect the state of some process or changing value within the context of an application.
The range of values represented by the meter bar bean can be changed easily. Regardless of the range, the meter bar is always drawn in terms of a fractional relationship in which you have a total number of parts and a current number of parts. So, if you wanted to model a thermometer using the meter bar, for example, you would set the total number of parts to 100 degrees Celsius, and then the current number of parts would always be between 0 and 100 degrees. The meter bar would be empty when the current temperature is 0 degrees and full when the current temperature is 100 degrees. At values between 0 and 100 degrees, the bar would be of varying lengths.
Like the fancy button bean, the meter bar bean supports the capability to change the background and foreground colors. The background color corresponds to the area immediately surrounding the meter bar, and the foreground color determines the color of the bar itself. The meter bar doesn't support any type of user interface interaction such as mouse clicks or key presses. This is a reflection of the fact that the meter bar bean is purely an output bean.
Now that you have an idea of what the meter bar does, let's move on to designing some specifics about it. As you might recall from Chapters 9 and 10, the design of a bean can be broken down into three major parts: properties, methods, and events. The rest of this section focuses on the meter bar bean and the design of these major functional parts.
The properties for the meter bar bean must somehow represent the information required to support the functionality mentioned in the previous section. Similar to the fancy button bean, you don't have to specifically define all these properties yourself. The reason for this is that you are going to derive the meter bar bean from the AWT Canvas class, which represents a rectangular area onto which you can draw or trap input events from the user. In this case, you are only deriving from Canvas, so you can draw the bean. The Canvas class is derived from the Component class, which provides the base functionality typically required of graphical beans, including background and foreground colors, name, and font properties. This brings up a subtle point in regard to the meter bar: The meter bar draws no text, so the font property doesn't make any sense. Therefore, it would be preferable not to see the font property when editing the bean in a visual environment. You'll deal with this situation in the "Additional Overhead" section later in this chapter, when you develop a bean information class for the meter bar bean.
The first property to address in the bean's design is probably the least obvious in terms of its functionality. I'm referring to the orientation property, which specifies whether the meter bar is filled horizontally or vertically. This property is actually quite useful, because it provides some flexibility as to how the meter bar bean appears. Unfortunately, there is no built-in property type for representing the bean's orientation, which means that you will have to develop your own. In addition to developing a class that represents the orientation property type, you must also develop a property editor class so that the property can be edited in an application builder tool. Don't get too worried just yet, because it turns out to be easy to develop custom properties and property editors. You'll find out firsthand in "The HVOrientation Property Class."
Another meter bar bean property that isn't entirely obvious is the raised property, which determines how the 3D border of the bean is drawn. If the raised property is true, then the border is drawn to look raised from the screen. If not, the border is drawn to look inset. This is a simple boolean property, but it adds a certain degree of flair to the meter bar bean.
The last two properties the meter bar bean needs are the most obvious ones, because they are necessitated by the basic functionality of the bean: the current number of parts and total number of parts properties. These two properties form a fractional pair that is used to determine how much of the meter bar is drawn. Keep in mind that the total number of parts property should always be greater than or equal to the current number of parts.
These properties are sufficient for modeling all the functionality requirements of the meter bar bean. Combined with those provided by the parent Canvas class, these properties form the full set of properties for the bean. To recap, following are the properties required of the meter bar bean:
Now that we've defined the properties, it's time to press onward and determine the public methods required of the meter bar bean. The easiest place to start is with the accessor methods for the bean, because you already have a good idea about the properties for the bean. All the properties in the bean are readable and writable, so you know they will all require a pair of accessor methods. Therefore, the accessor methods for the bean consist of method pairs for each property.
Beyond accessor methods, you also have to consider the other public methods that the bean must provide. It turns out that the meter bar bean needs only a few additional public methods. The first of these, paint(), is overridden from the parent Canvas class to enable the bean to paint itself. The other public methods required of the bean are provided to add a little more flexibility as to how the bean can be used. These methods are called incParts() and decParts() and are used to increment and decrement the current number of parts property. This gives bean users an alternative way to change the meter bar state beyond the setter method for the current number of parts property.
Following are the public methods required of the meter bar bean:
Because the meter bar bean is primarily used for output purposes, there really is no need for it to process events in any way. You technically could have the bean fire an event whenever the number of parts reaches the total number of parts, but it doesn't seem like a very important feature at this point. So, the design of the meter bar bean includes no provision for events.
With the design for the meter bar bean behind you, it's time to move on to writing the actual code. You'll find that some aspects of the meter bar code are similar to the code for the fancy button bean covered in Chapter 10. This is because all beans share a certain amount of common functionality, such as properties, accessor methods, and so on. Even so, there is plenty of new code in the meter bar bean for you to have fun with!
Check out the complete source code for the meter bar bean, which is included on
the accompanying CD-ROM, as you read through this section. The main code for the
meter bar bean is in the MeterBar class, which appears on the
CD-ROM in the file MeterBar.java.
The first area to address in terms of the code for the meter bar bean is the properties. Following are the member variable properties for the bean based on the initial design:
private HVOrientation orientation;


private boolean       raised;


private float         numParts;


private float         totalParts;
These member variables are the only ones defined in the meter bar bean and directly correspond to the properties mentioned earlier in the "Designing the Meter Bar Bean" section. Unlike the fancy button bean, one of these member variables, orientation, is not of a built-in Java type but rather of type HVOrientation, which is a custom property class. (You learn more about the HVOrientation property type in the following section.) For now, turn your attention toward the other properties defined in the meter bar bean. The rest of the properties in the bean are built-in Java types, which means that JavaBeans has already provided property editors for them. Therefore, you don't have to add any overhead to provide visual editing support for these properties. However, the orientation property is a different story, as you learn next. The HVOrientation Property Class The orientation property uses the HVOrientation property class to specify its property type. This class represents a horizontal or vertical orientation that can be applied to a graphical interface element such as the meter bar bean. The reason for having this class is so that the orientation for the meter bar can be appropriately represented. The different orientations could have been represented by static integers, but this wouldn't be nearly as intuitive for users of the bean. Listing 11.1 contains the complete source code for the HVOrientation property class.
// HVOrientation Property Class
// HVOrientation.java
package PJB.Source.Chap11.MeterBar;
// Imports
import java.io.Serializable;
public class HVOrientation implements Serializable {
public static final HVOrientation HORIZONTAL =
 new HVOrientation(0);
public static final HVOrientation VERTICAL =
 new HVOrientation(1);
private int orientation;
// Constructors
public HVOrientation() {
this(0);
}
public HVOrientation(String s) {
this(toInt(s));
}
private HVOrientation(int o) {
orientation = o;
}
// Public methods
public String toString() {
if (orientation == 0)
return "Horizontal";
else
return "Vertical";
}
public boolean equals(Object o) {
if (o == null || !(o instanceof HVOrientation))
return false;
if (orientation != ((HVOrientation)o).orientation)
return false;
return true;
}
public static HVOrientation valueOf(String s) {
return new HVOrientation(toInt(s));
}
// Private support methods
private static int toInt(String s) {
if (s == null || s.toLowerCase().equals("vertical"))
return 1;
return 0;
}
}
This might seem like a lot of code for simply representing the type of the orientation property. However, most of the code in this class is used to provide information about the property for use in a variety of situations. I think you'll find this code to be pretty straightforward when you understand its significance.
The whole point of providing a property class is to encapsulate the information
about a custom property in one place while providing a well-defined
interface. The HVOrientation class accomplishes this by wrapping the horizontal
and vertical orientation values in a self-contained unit. Notice in the code that
these values are represented by public static final member variables. These standard
values can be used anywhere as orientation settings, which is the whole purpose of
this class. Also notice that an integer is used to store the internal representation
of the orientation property. However, this internal representation is hidden from
the outside world, forcing users of the class to always work in terms of the HORIZONTAL
and VERTICAL standard values.
The rest of the code in the HVOrientation class is devoted to manipulating the property information in a variety of ways for external access. For example, the toString() method returns a string representation of the property's value. The equals() method compares the property's value with another HVOrientation object to see if they are equal. The last of the public methods in HVOrientation is valueOf(), which returns an HVOrientation object based on a string representation of the property.
There is a private method defined in HVOrientation in addition to the public methods just covered: toInt(). The toInt() method returns the integer representation of an orientation based on a string representation. This method is useful internally for converting string orientations to integer orientations. The HVOrientationEditor Class Even though you've successfully created a custom property class to represent the orientation property for the meter bar bean, your job isn't quite done in terms of the orientation property. All editable properties should have a property editor that can be used by application builder tools to provide visual editing capabilities. The property editor for the HVOrientation property class comes in the form of the HVOrientationEditor class. Listing 11.2 contains the complete source code for the HVOrientationEditor property editor class.
// HVOrientationEditor Class


// HVOrientationEditor.java


package PJB.Source.Chap11.MeterBar;


// Imports


import java.beans.*;


public class HVOrientationEditor extends PropertyEditorSupport {


  public String getJavaInitializationString() {


    if (((HVOrientation)getValue()).equals(HVOrientation.


    ÂHORIZONTAL))


      return "HVOrientation.HORIZONTAL";


    return "HVOrientation.VERTICAL";


  }


  public String getAsText() {


    if (((HVOrientation)getValue()).equals(HVOrientation.


    ÂHORIZONTAL))


      return "Horizontal";


    return "Vertical";


  }


  public void setAsText(String text) throws


    java.lang.IllegalArgumentException {


    if (text.toLowerCase().equals("horizontal"))


      setValue(HVOrientation.HORIZONTAL);


    else if (text.toLowerCase().equals("vertical"))


      setValue(HVOrientation.VERTICAL);


    else


      throw new java.lang.IllegalArgumentException(text);


  }


  public String[] getTags() {


    String result[] = { "Horizontal", "Vertical" };


    return result;


  }
}
First, note that the naming of the HVOrientationEditor class is not mere convenience; you are required to name property editors the name of the property class, with the text Editor appended to the end. This consistent naming is how JavaBeans can automatically detect property editors and enable them to be used without a bunch of registration overhead.
To understand how the HVOrientationEditor class works, it is important to understand first what it is supposed to do. The role of a property editor class is to provide a means of visually editing a property. You might be thinking that this sounds like a daunting task involving lots of user interface management code. Fortunately, JavaBeans goes a long way in providing built-in functionality to help build property editors, so you often can create a custom property editor with very little work. The HVOrientation property editor is an example of a property editor that requires little additional overhead.
Most of the code you see in the HVOrientationEditor class is devoted to manipulating the HVOrientation property nonvisually. The visual functionality is provided automatically by built-in JavaBeans support classes. The first method in HVOrientationEditor, getJavaInitializationString(), is required to return a string representation of the property value suitable for inclusion in Java code that is setting the value of a property. This method is called by application builder tools to generate the appropriate Java code. In other words, the return value must be a string in a form suitable for an assignment in Java code.
The getAsText() and setAsText() methods provide a means of converting the property to text and back, which is important because many visual tools rely on textual presentation of properties. Possibly the most important method in HVOrientationEditor is the getTags() method, which returns a list of string tags for the property. The getTags() method specifies that the property value is one of a fixed set of tagged values, which in this case is a list of strings. This simple method is responsible for giving the property editor the capability to present the property values as a drop-down list.
With the properties squared away, let's move on to the constructors for the meter bar bean. The meter bar bean provides two constructors: a default constructor and a detailed constructor that takes all four properties as arguments. Following is the code for both of these constructors:
public MeterBar() {


  this(HVOrientation.HORIZONTAL, false, 50, 100);


}


public MeterBar(HVOrientation o, boolean r, float n, float t) {


  // Allow the superclass constructor to do its thing


  super();


  // Set properties


  orientation = o;


  raised = r;


  numParts = n;


  totalParts = t;


  setBackground(Color.lightGray);


  // Set a default size


  if (orientation.equals(HVOrientation.HORIZONTAL))


    resize(60, 15);


  else


    resize(15, 60);
}
The first constructor simply calls the second constructor with default property values. The second constructor is responsible for actually initializing the bean. This constructor begins by calling the superclass constructor, which is pretty standard in AWT-derived classes. The constructor then moves on and sets all the properties, including the inherited background color property.
With the properties set, the constructor then sets the default size for the bean. The bean is sized based on its orientation, which is logical because most horizontal meter bars are wider than they are tall--vice versa for vertical meter bars. The initial size of the bean in either case is arbitrary, based only on a guess as to the average size of a meter bar in common scenarios.
The next part of the meter bar bean to tackle is its accessor methods, which provide access to bean properties. Following is the code for the orientation property's accessor methods:
public HVOrientation getOrientation() {


  return orientation;


}


public void setOrientation(HVOrientation o) {


  if (orientation != o) {


    orientation = o;


    // Swap the width and height to reorient the meter bar


    resize(size().height, size().width);


    Component p = getParent();


    if (p != null) {


      p.invalidate();


      p.layout();


    }


  }


}
The getOrientation() getter method is self-explanatory, because it simply returns the value of the orientation member variable. The setOrientation() setter method is more involved, because it resizes the bean after setting the orientation member variable. The reason for resizing the bean is so the meter bar will keep the same look, regardless of its orientation. In other words, a horizontal meter bar that is wider than it is tall would look more natural in a vertical orientation that is taller than it is wide. You determine the new size of the bean simply by swapping the existing width and height.
The accessor methods for the raised property, isRaised() and setRaised(), are straightforward in that they simply get and set the value for the raised member variable. The only additional code is the call to repaint() in setRaised(), which forces the bean to repaint itself to reflect the change in its appearance. Following is the code for these accessor methods:
public boolean isRaised() {


  return raised;


}


public void setRaised(boolean r) {


  raised = r;


  repaint();
}
The accessor methods for the number of parts property are minimal as well. Following is the code for them:
public float getNumParts() {


  return numParts;


}


public void setNumParts(float n) {


  numParts = Math.max(0.0f, Math.min(totalParts, n));


  repaint();
}
The getter method, getNumParts(), simply returns the value of the numParts member variable. The setter method, setNumParts(), sets the value of the numParts member variable while making sure the new value isn't greater than the total number of parts. This method then repaints the bean to reflect the change in the meter bar position caused by modifying the number of parts.
The last set of accessor methods belongs to the total number of parts property. Following is the code for these methods:
public float getTotalParts() {


  return totalParts;


}


public void setTotalParts(float t) {


  totalParts = Math.max(0.0f, t);


  if (numParts > totalParts)


    numParts = totalParts;


  repaint();
}
The getter method, getTotalParts(), not surprisingly just returns the value of the totalParts member variable. The setter method, setTotalParts(), sets the value of the totalParts member variable while making sure it is greater than or equal to zero. This method then checks the value of the numParts member variable and constrains it to the value of totalParts if it is greater. The method finishes by repainting the bean to reflect the change in the meter bar position caused by modifying the total number of parts.
There are a few public methods in the bean: paint(), incParts(), and decParts(). Let's take a look at the paint() method first, because it is the most involved. Following is the source code for the paint() method:
public synchronized void paint(Graphics g) {


  int width = size().width;


  int height = size().height;


  // Paint the background with 3D effects


  g.setColor(getBackground());


  g.fillRect(1, 1, width - 2, height - 2);


  g.draw3DRect(0, 0, width - 1, height - 1, raised);


  // Paint the foreground meter bar


  g.setColor(getForeground());


  if (orientation.equals(HVOrientation.HORIZONTAL))


    g.fillRect(3, 3,


      (int)((numParts * (width - 6)) / totalParts), height - 6);


  else


    g.fillRect(3, height - 3 - (int)((numParts * (height - 6)) / ÂtotalParts),


      width - 6, (int)((numParts * (height - 6)) / totalParts));


}
The paint() method starts off by getting the width and height of the bean, filling in the background, and painting a 3D effect around the edges. This code should look somewhat familiar to you, because it is similar to the code used to paint the fancy button bean. The paint() method paints the meter bar itself next by selecting the foreground color and filling a rectangle according to the values of the numParts and totalParts member variables.
The other public methods implemented in the meter bar bean, incParts() and decParts(), provide a means of incrementing and decrementing the number of parts by a certain amount. These methods each come in two versions: one for incrementing and decrementing by a specific value, and one for incrementing and decrementing by one. The code for these methods follows:
public void incParts(float i) {


  numParts = Math.max(0.0f, Math.min(totalParts, numParts + i));


  repaint();


}


public void decParts(float i) {


  numParts = Math.max(0.0f, Math.min(totalParts, numParts - i));


  repaint();


}


public void incParts() {


  incParts(1.0f);


}


public void decParts() {


  decParts(1.0f);
}
The first incParts() method increments the number of parts by an amount passed as an argument. It is careful to constrain the newly incremented number of parts against 0 and the total number of parts. You might not immediately see why it is important to constrain the value against 0, because it is being incremented rather than decremented. Well, it is possible to pass a negative number as the amount to increment, in which case the value would really be decremented. This attention to detail and potential misuses of public bean methods is critical in developing robust beans. This incParts() method finishes by repainting the bean to reflect the incremented number of parts.
The first decParts() method is practically identical to incParts(), except it decrements the number of parts. decParts() performs the same constraints for the same reasons and finishes by repainting the bean. The second version of each of these methods simply calls the first version, with a value of 1.
You've now covered all the source code for the meter bar bean itself. Although the MeterBar, HVOrientation, and HVOrientationEditor classes are all you need to have a fully functioning bean, there is actually one other class that makes the meter bar bean complete: MeterBarBeanInfo. Recall from Chapter 10 that the fancy button bean uses a bean information class to specify icons that graphically represent the bean in application builder tools. The MeterBarBeanInfo class performs this function, as well as another one that the fancy button bean didn't have to worry about: hiding an inherited property. Listing 11.3 contains the complete source code for the MeterBarBeanInfo class.
// MeterBarBeanInfo Class


// MeterBarBeanInfo.java


package PJB.Source.Chap11.MeterBar;


// Imports


import java.beans.*;


public class MeterBarBeanInfo extends SimpleBeanInfo {


  // Get the appropriate icon


  public java.awt.Image getIcon(int iconKind) {


    if (iconKind == BeanInfo.ICON_COLOR_16x16) {


      java.awt.Image img = loadImage("MeterBarIcon16.gif");


      return img;


    }


    if (iconKind == BeanInfo.ICON_COLOR_32x32) {


      java.awt.Image img = loadImage("MeterBarIcon32.gif");


      return img;


    }


    return null;


  }


  // Explicit declare the properties


  public PropertyDescriptor[] getPropertyDescriptors() {


    try {


      PropertyDescriptor


        // Inherited properties


        foreground = new PropertyDescriptor("foreground",ÂMeterBar.class),


        background = new PropertyDescriptor("background", ÂMeterBar.class),


        font = new PropertyDescriptor("font", MeterBar.class),


        name = new PropertyDescriptor("name", MeterBar.class),


        // New properties


        orientation = new PropertyDescriptor("orientation,  ÂMeterBar.class),


        raised = new PropertyDescriptor("raised", MeterBar.class),


        numParts = new PropertyDescriptor("numParts", 	        ÂMeterBar.class),


        totalParts = new PropertyDescriptor("totalParts", 	        ÂMeterBar.class);


      // Hide the font property


      font.setHidden(true);


    PropertyDescriptor[] pd = { foreground, background, font, 	    Âname, orientation,


        raised, numParts, totalParts };


      return pd;


    }


    catch (IntrospectionException e) {


      throw new Error(e.toString());


    }


  }
}
The first method in the MeterBarBeanInfo class, getIcon(), is almost identical to the same method in the fancy button bean's information class. The only difference is the specification of the GIF files for the icons themselves. These icons are provided as GIF 89a images and are shown in Figure 11.1.
Figure
11.1. The bean information icons for the
meter bar bean.
The second method used in the MeterBarBeanInfo class is getProperty-Descriptors(),
which is used to explicitly specify the properties exposed by the bean. The purpose
of implementing this method is to exclude the font property from being exposed by
the bean. This is necessary because the inherited font property has no significance
to the meter bar bean. The getPropertyDescriptors() method requires you
to declare every property that is to be exposed by the bean. So, excluding the font
property is a simple matter of calling the setHidden() method on the property
before it is returned by getPropertyDescriptors(). Notice that the other
inherited properties (foreground, background, and name) are still exposed normally.
Like the fancy button bean, the meter bar bean also requires a manifestation file to be included in the JAR file that contains the bean. The code for the meter bar bean's manifestation file, MeterBar.mf, follows:
Manifest-Version: 1.0


Name: PJB/Source/Chap11/MeterBar/MeterBar.class


Java-Bean: True
No surprises here! The only difference between this manifest file and the one used for the fancy button bean is the name of the bean class and its package association.
CAUTION: Before you compile the meter bar bean, make sure you have the CLASSPATH environment variable properly set so that the compiler can locate its support classes. In other words, make sure the root path above the bean package hierarchy is included in CLASSPATH. This directory is the parent directory of the PJB directory.
NOTE: The complete source code and related resources for the meter bar bean are located on the accompanying CD-ROM.
As with all custom beans, you must follow a few steps to add the meter bar bean to the BeanBox before you can test it. Once the bean is compiled, you need to create a JAR file containing the bean and its resources. You then copy this JAR file to the jars directory beneath your BDK installation. The BeanBox looks in this directory for all the beans to add to its ToolBox. Following are the steps necessary to get the meter bar bean up and running in the BeanBox:
To build a JAR file that contains the meter bar bean, execute the following command from the directory above the meter bar package hierarchy:
beanjar PJB\Source\Chap10\FancyButton FancyButton
To launch the BeanBox, simply execute the run.bat batch file, like this:
run
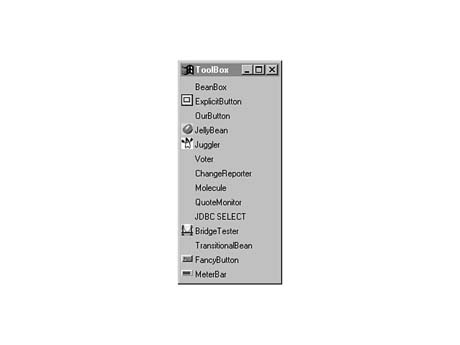
After you execute this command, the BeanBox should appear with your meter bar bean added to the ToolBox. Figure 11.2 shows how the ToolBox looks with the bean added.
Figure
11.2. The BeanBox ToolBox window with the
meter bar bean added.
Notice in the figure that the last bean in the ToolBox is the meter bar bean, complete
with the 16x16 icon you specified in the bean information class. Try using the bean
by adding it to the BeanBox; just click it in the ToolBox and then click the main
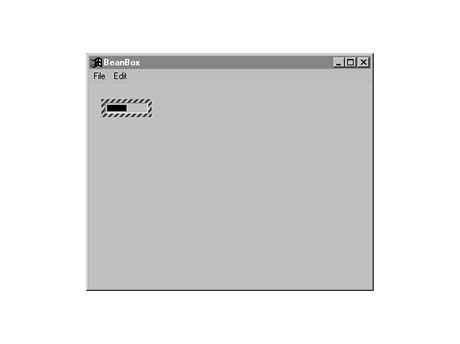
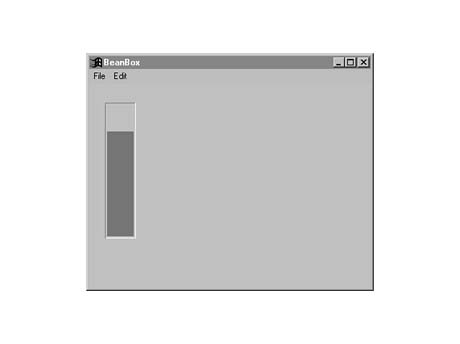
container window. Figure 11.3 shows the newly added meter bar bean.
Figure
11.3. The BeanBox main container window with
a meter bar bean added.
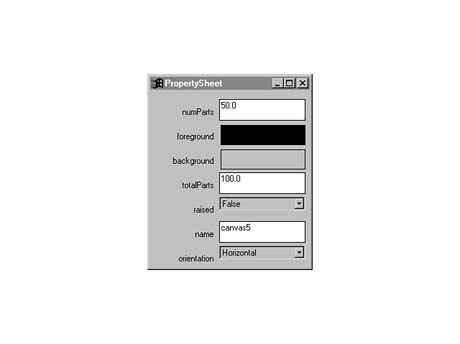
After the bean has been added to the container window, you are ready to check the
PropertySheet window and see how the properties look. Figure 11.4 shows the PropertySheet
window for the meter bar bean.
Figure
11.4. The BeanBox PropertySheet window for
the meter bar bean.
The PropertySheet window shows all the properties for the bean, including the inherited
foreground and background colors, name properties, and your properties. Notice first
that the font property is missing, thanks to the method you overrode in the bean
information class. Also take a close look at the orientation property, which is using
the custom property editor you implemented. The orientation property is displayed
as a drop-down list from which you choose a value. Pretty slick, huh?
Try editing the foreground color, orientation, number of parts, and total parts for the bean. Figure 11.5 shows the bean with these properties modified.
Figure
11.5. The BeanBox main container with a modified
meter bar bean.
As you can see, the meter bar bean provides some pretty neat functionality without
all that much work. Most important is the fine control you exercised over the property
editing support in the meter bar bean, which clearly pays off at this stage, when
it comes to actually using the bean.
The last topic of this chapter deals with how the meter bar bean can be improved. I thought you might be feeling a little cheated because I did all the work for you, so I've come up with some ideas for how you can improve the meter bar bean on your own. You're gaining enough experience with bean development that you should be able to try out some of these suggestions if you have the desire. Following is a list of possible improvements that you could make to the meter bar bean:
The first suggestion involves adding code to the paint() method so that it also draws text that indicates the percentage of the meter bar that is filled. For example, if the current number of parts property is set to 25 and the total number of parts property is set to 50, then the string 50% would be drawn on top of the meter bar. The only trick to adding this feature is dealing with the fact that the text would be drawn on top of different colors in some cases. Consider the situation in which the meter bar is oriented horizontally and set to 50 percent. In this situation, the left side of the bean is painted in the foreground color, and the right side is painted in the background color. If you paint the percentage text in the center, you have to deal with this issue and make sure the text is visible over both colors.
The second suggestion is related to situations in which it might be nice to know when the meter bar has reached its full capacity. In other words, whenever the number of parts property is incremented to equal the total number of parts property, you could fire an event to notify any interested listeners. This enhancement is straightforward in that it involves adding an event type, as well as event listener registration and processing methods.
The final suggestion involves adding an input mode for the meter bar bean. This would effectively enable the bean to function somewhat like a slider input control, which means you can click the meter bar to set its value.
This chapter continues with the theme of Part III by guiding you through the development of another complete bean. You developed a complete meter bar bean, which can be used in a variety of different scenarios involving the presentation of the status of a process or of some changing value. You first went through a preliminary design of the meter bar bean, just as you did in Chapter 10 with the fancy button bean. You then moved quickly into developing the actual code for the bean, after which you put the bean through its paces in the BeanBox. You finished the chapter by looking at a few ways in which the meter bar bean can be improved.
The meter bar bean you designed and developed in this chapter is useful as an output bean, which means that it handles no user interaction and is merely a means of displaying information in a more interesting format. This is a popular use of beans, because graphical environments encourage the graphical presentation of information. Chapter 12, "An LED Display," follows up on this approach by presenting another interesting output-oriented bean, an LED display bean. The LED display bean displays numeric output in a graphical format similar to a calculator's LED display.
![]()
![]()
![]()
![]()
![]()